
Making Your Systematic Review Easy
Author: Kiran Basra
For students involved in clinical research, the systematic review is often the first project you are given. Unlike a narrative review, which provides a broad, expert-driven overview of a topic, or a scoping review, which maps the existing literature without necessarily evaluating study quality, a systematic review uses a predefined, transparent methodology to identify, appraise, and synthesize all relevant evidence addressing a specific research question. The goal is to minimize bias and provide the most comprehensive and reliable answer possible based on the available literature.
Progress made during writing up a systematic review depends largely on your own initiative. One of your goals in this context can be to read every single piece of scientific literature on a specific question, in order to make an overall judgement about the answer to that question. In the setup phase, you need to form your question and decide what sorts of research you will trust to help you answer it. In the screening phase, you read titles and abstracts of thousands of papers to identify studies of interest. During full-text review, you read dozens to hundreds of papers to check if they fit your requirements. During data extraction and your assessment of risk of bias, you assess what information the paper presents and the degree to which you trust it. Finally, you analyze all the data you have and write your paper.
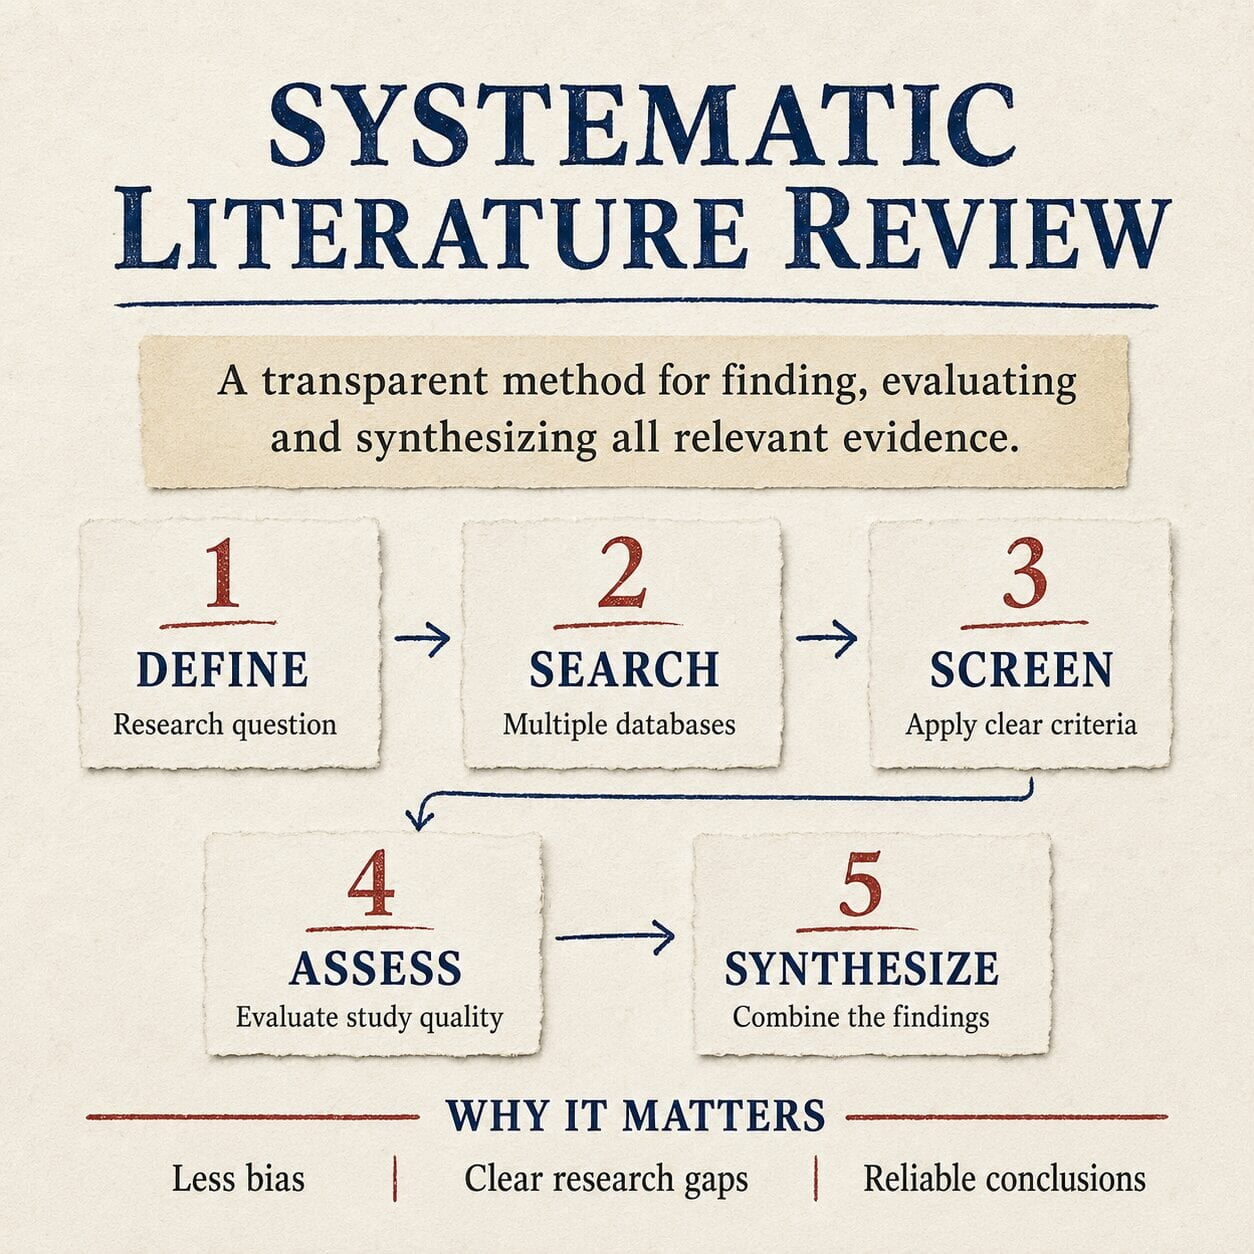
The guidelines for each phase tend to be vague, and that can be overwhelming, especially when you are a new grad student. In the past year, I’ve led one systematic review and contributed to another four; I’ve done things a lot of different ways, and I’ve thought a lot about what worked well and what made working on a systematic review a longer and more miserable process. Here are some ways to make your review more efficient:
Setup
Start with good organization and documentation practices. Create a timeline and rework the timeline when you need to! Consider keeping a log or document things in a lab notebook like you would in a wet lab; how many papers did you get from a certain database? How many were automatically identified as duplicates? When did you perform your searches?
Consult with a health sciences librarian and ask them to look over your searches, before you implement them; then listen to what they have to say. Even when they aren’t well-versed in the substantive topic of your choice, a research librarian is an expert on the databases you’re about to be searching for the first time. They’ll tell you if your search is inefficient, or will yield thousands of useless results, or if you haven’t considered searching a database that you really should include. For example, if you’re interested in fetal alcohol syndrome, a health librarian would remind you to also search using the British spelling, foetal.
Screening
Covidence is an excellent platform if you use it properly. Don’t copy-paste the inclusion/exclusion criteria from your proposal, think about it and put specific information down. The red and green highlights are your best friends; use them liberally. Highlighting “years old” in green will allow you to quickly check if the study’s population fits yours. Highlighting “interview” in red will allow you to quickly identify and exclude qualitative studies. The Covidence platform automatically sorts studies by “most relevant,” but it’s best to sort studies by author. This means any duplicates that did not get identified by the platform will be right next to each other.
Screening should be done in duplicate; this way, any study one person misses is likely to be caught by someone else. Afterwards, you meet to look at the studies you disagreed on and resolve conflicts. This happens much faster and more efficiently if you do it in-person. Don’t worry too much about excluding something important. 90% of the time, your automatic response will be the right one, and your partner will catch any mistakes you might make.
Full-text review
On your PRISMA (Preferred Reporting Items for Systematic Reviews and Meta-Analyses) flow diagram, you will need to report the number of studies identified, screened, included, and excluded at each stage of the review process, as well as the reasons for exclusion during full-text review. Making a list of exclusion reasons in order from easiest to identify to hardest to identify can make this process much more efficient. Try to prioritize criteria that can be identified quickly using the Ctrl + F function, reducing the amount of time spent manually reviewing each paper.
There are four special cases in full-text reviews that should be excluded under separate categories. Review papers, so you can look at their citation lists afterwards for any papers you might have missed. Unpublished work such as conference abstracts and theses, so you can reach out to the author and determine if this research led to a published article. Papers that cannot be accessed through the McMaster library, so you can request them through interlibrary loan services. The final category is ghost citations that need to be dropped; studies with unknown authors or missing DOIs, who don’t yield any results when searched on Google Scholar, picked up by accident through the Covidence program or your search.
Extraction + Risk of Bias
Create an extraction form or spreadsheet that is organized parallel to the way papers are written; for example, information on statistical analyses is always at the end of the methods section, and the demographics of a study are always at the beginning of the results section. If your spreadsheet wants you to input mean participant age before it has a spot to describe which statistical methods were used, you’ll be scrolling back and forth. Extract in alphabetical order by last name; this sheet will be continually consulted, so make sure it’s organized.
Risk of bias tools come in two forms; those that are short but ask complex questions, such as the Newcastle-Ottawa Scale, and those that are long but ask simple questions, such as ROBINS-I (Risk Of Bias In Non-randomized Studies of Interventions). Determine which method works better for you. If you find yourself tempted to skip steps on the risk of bias because you’re tired from extracting, do the risk of bias separately.
Analysis and drafting
Once you have your final list of studies, organize them in a spreadsheet or a notebook for quick referencing. Mark down their outcomes, their risk of bias results, and their population subgroups. This was, if you need to make a summary statement like “all the studies with low risk of bias,” you won’t miss any. Download or print all your papers; no matter how well you extracted them, you’ll find yourself rereading them over again, and it’s a pain to sign into the library each time.
When you write your paper, the biggest help will be the studies in your review. Check the rationales they put in their intros, the mechanistic explanations they put in their discussions, and whichever studies they cite for their backgrounds. It’s easy to slow down in this phase, because it tends to be written entirely on your own. Make sure to keep your timeline fresh in your mind, and that when something goes wrong make sure you plan a new timeline instead of deciding you can figure it out without the help of structure.
Conclusion
If you keep yourself organized and motivated, a systematic review can be planned, executed, and completed efficiently and effectively. You don’t need any excessive training, money, or resources to contribute something to your field (and to be first author!). The more efficient you are, the less self-regulation you need to muster. Good luck!